QR Codes menu
There are different types of QR cards available, so you can choose the one that best suits your workflow. Watch the Types of Access Cards video tutorial for a quick overview, or read on for more detailed information.
QR Codes can be accessed, downloaded and created in any Photo Job by clicking the QR codes button in the right column. Different options are available to download, depending on the needs and requirements of each Photo Job, as follows:

Blank access cards
Blank cards are QR code cards that have not yet been assigned to a participant and contain the GDPR consent form to be signed before the shooting.
Clicking on this button will bring up a menu with all the information about the blank cards already created, as well as the fields to be filled in to create new ones as follows:

Number of participants: Select the number of estimated participants which will determine the number of blank cards to create.
Group or class: Select the group from which the QR Cards will be created.
Type of photos: Specify the type of photos offered to the group. This will be included on the Blank card for the participant to choose.
Once filled in, click the Create button in the top right-hand corner. They will appear in a table below, along with the rest of the blank cards. To download them, simply click on the download button in the table for the appropriate group. When finished, click Continue.

Each Blank Card consists of two sections:
Upper section: Contains instructions and a QR code for the person being photographed. This part is for the customer.
Bottom section: Contains a privacy agreement for the participant or legal representative to sign, along with the type of photos to take. Once signed and filled, you must keep this section.
Access cards for common galleries
Allow you to create QR Codes for common galleries such as group photos. This allows you to sort common galleries in the same way as individual galleries. For more information, see the Workflow — Step-by-step guide article.
When selected, the following menu will appear:

Number of galleries: Choose the number of common galleries to create.
Group or class: Select the group or class where the QR common cards will be created.
Once the information is filled in, click Create in the top right corner. It will be available in the table below. Click on the download button in the table to download it.
Access cards with images
This option allows you to download QR cards from the galleries with images already uploaded. When selected, a menu will appear for you to choose from:

Group or class: Select the group or class you want to download.
Participant: Choose between without login, without order or All.
Layout: Select a layout option for the PDF.
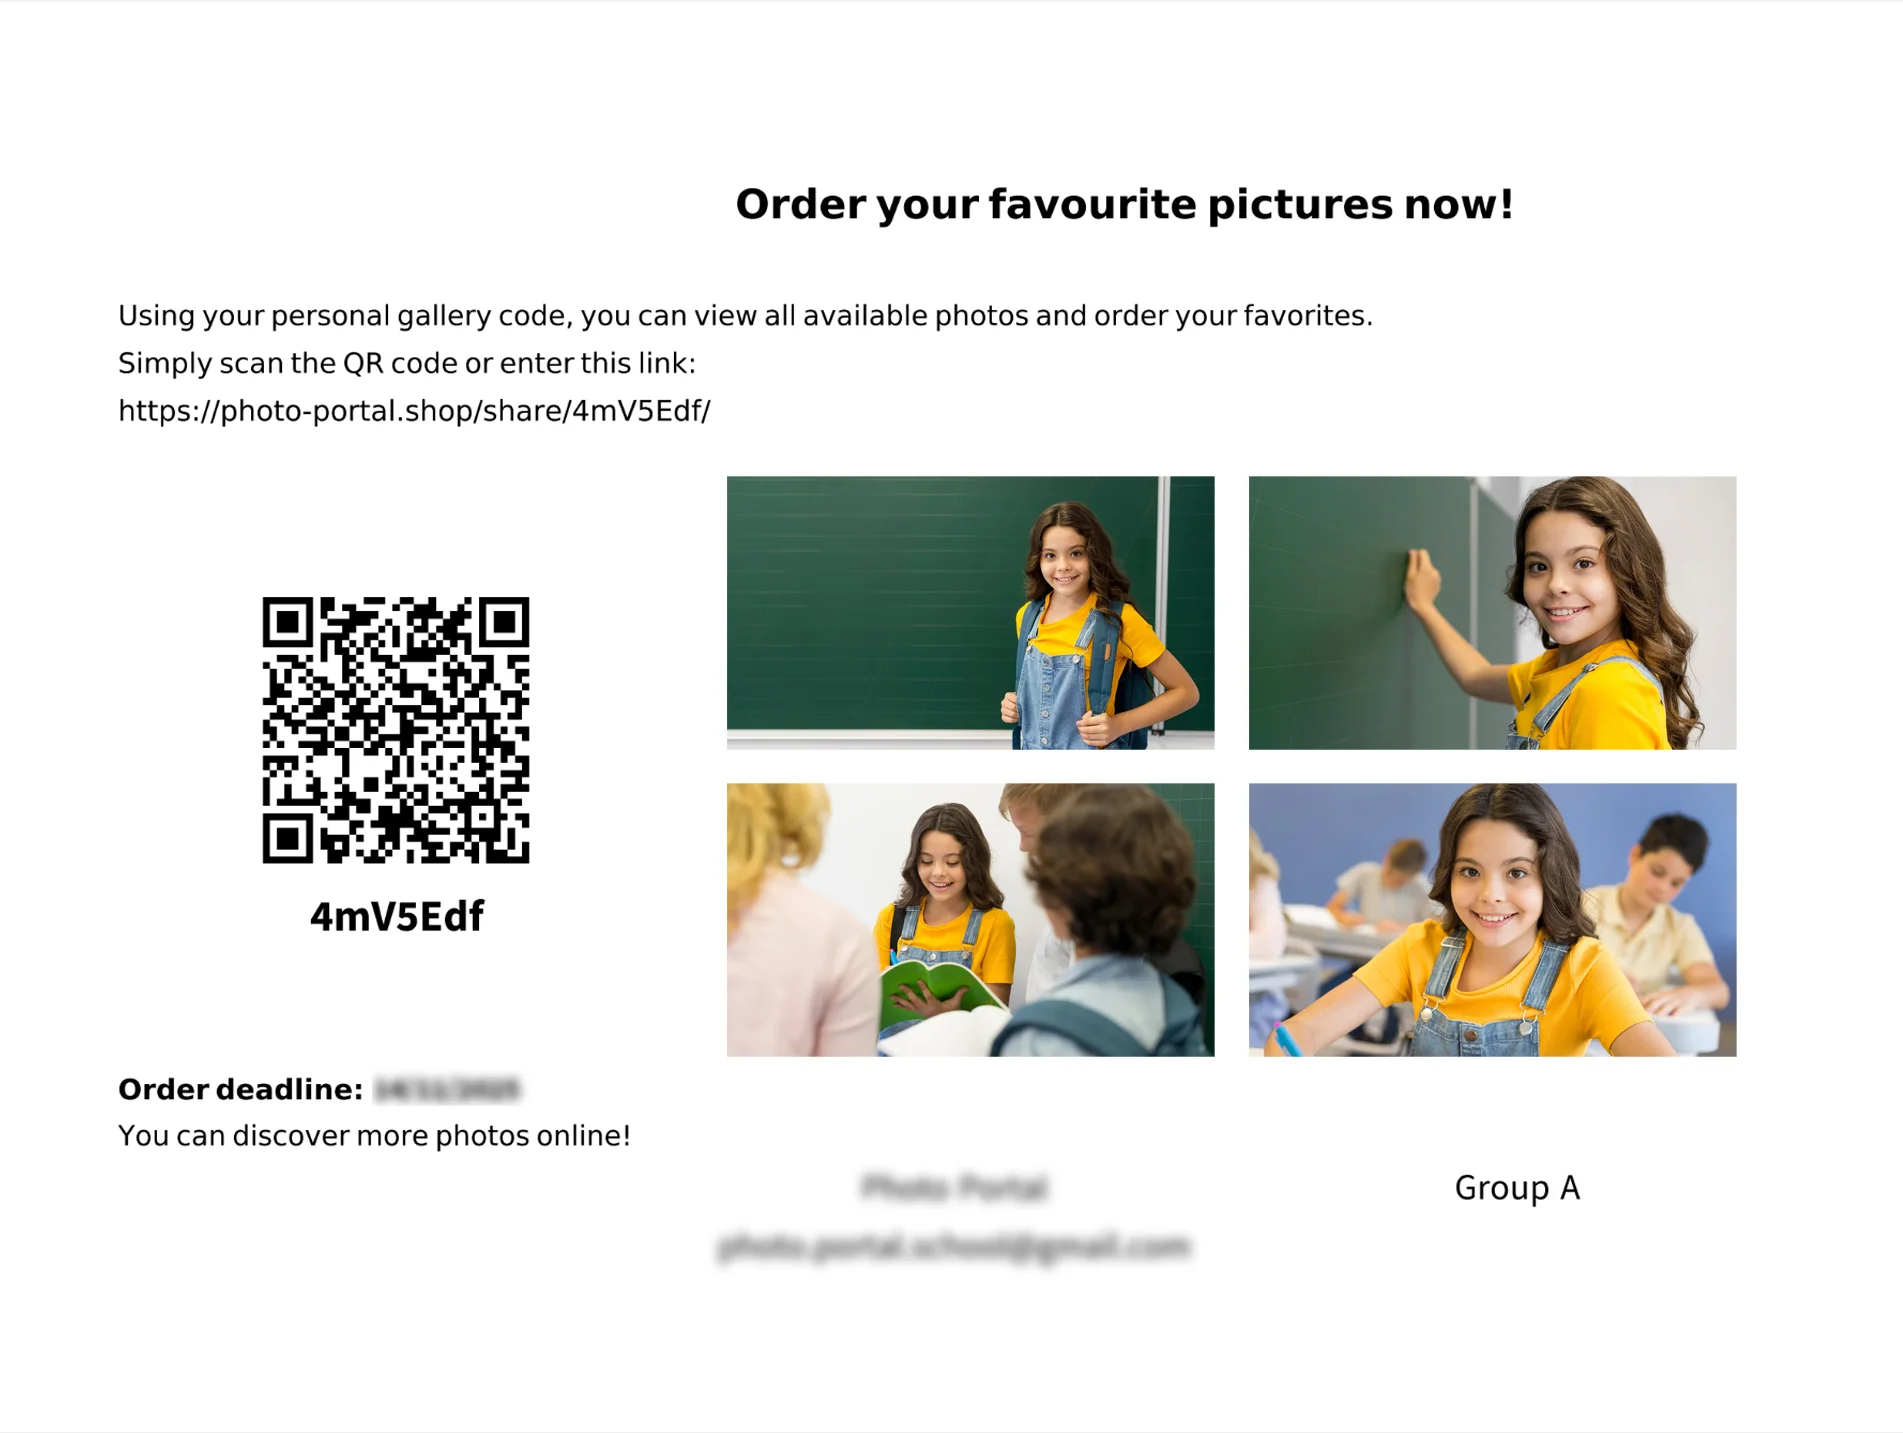
Once filled in, click Download. The corresponding PDF file will be downloaded. This QR card contains instructions on how to access and order from the gallery, the deadline, your contact details and some of the photos included in the gallery to motivate access. If you select the Preview sheet option, you can upload the PDF directly via the webshop, order it as prints, and have them sent directly to the centre if you want. This allows clients not only to access their private gallery but also to see the quality of the photo products.

For more information, read the Access Cards with Images article.
Access cards with contact
This option allows you to download QR cards that have already been assigned to a participant via Online Registration. Note that you must print and bring them with you on the day of the photoshoot for automatic sorting. When selected, a menu will appear for you to select:

Group or class: Select the group or class you want to download.
Participant: Choose between without login, without order or All.
Layout: Select a layout option for the PDF:
- 1 per sheet: Only one QR code card will be printed per sheet.
- 2 per sheet: Two different QR code cards will be printed per sheet.
- Print data for own templates (DIN A5): QR code data will be printed on a plain white sheet without formatting. This option allows you to design your own templates according to the arrangement of the data on this sheet. Once your design is ready, you can use this option to print the data onto your customised templates.
Once filled, click Download. The corresponding PDF file will be downloaded. Each QR Card will contain the name of the participant, class or group, type of photos registered, QR code for accessing, and a link to the gallery with instructions on how to access and order from it.
It’s necessary to photograph this QR code before photographing the participant for automatic sorting. You are then free to distribute them to the participants if you wish. For more information, read the Workflow — Step-by-step guide article.
Adding a logo to QR Cards
You can customise your QR Card with your logo. Go to the Sales Panel and open the QR Code Settings.
You can upload your logo by clicking on the Upload image button and selecting your logo. This will customise your QR cards and make your logo visible on them.To better understand the final result, click on Download sample files to get a sample set of QR cards. You can also click on Download Preview PDF to download a preview of your QR Cards. Remember to click Save to save your changes.

For a complete overview of Saal Photo Portal, watch our full Photo Portal Setup Walkthroughs tutorials.


