Prints
In the product section you will find a wide range of products including photo prints, fine art prints, passport photos, photo sets and more. Find out how to order these products individually or in bulk.
Once you have selected your articles, a window will open for you to add your images. You can simply drag and drop images into the window or click the Add images button to select photos from your device or any online source. If you have previously sorted your image selection and would like to keep the same organisation, you should drag and drop the images in the same order. Once you have selected your images, press the Next button.

A product selection window will appear, displaying the previously selected product. However, you have the option to select a different product from the left column, which lists all available single image products. In the middle column you can configure specific options such as finish or format for the selected product.
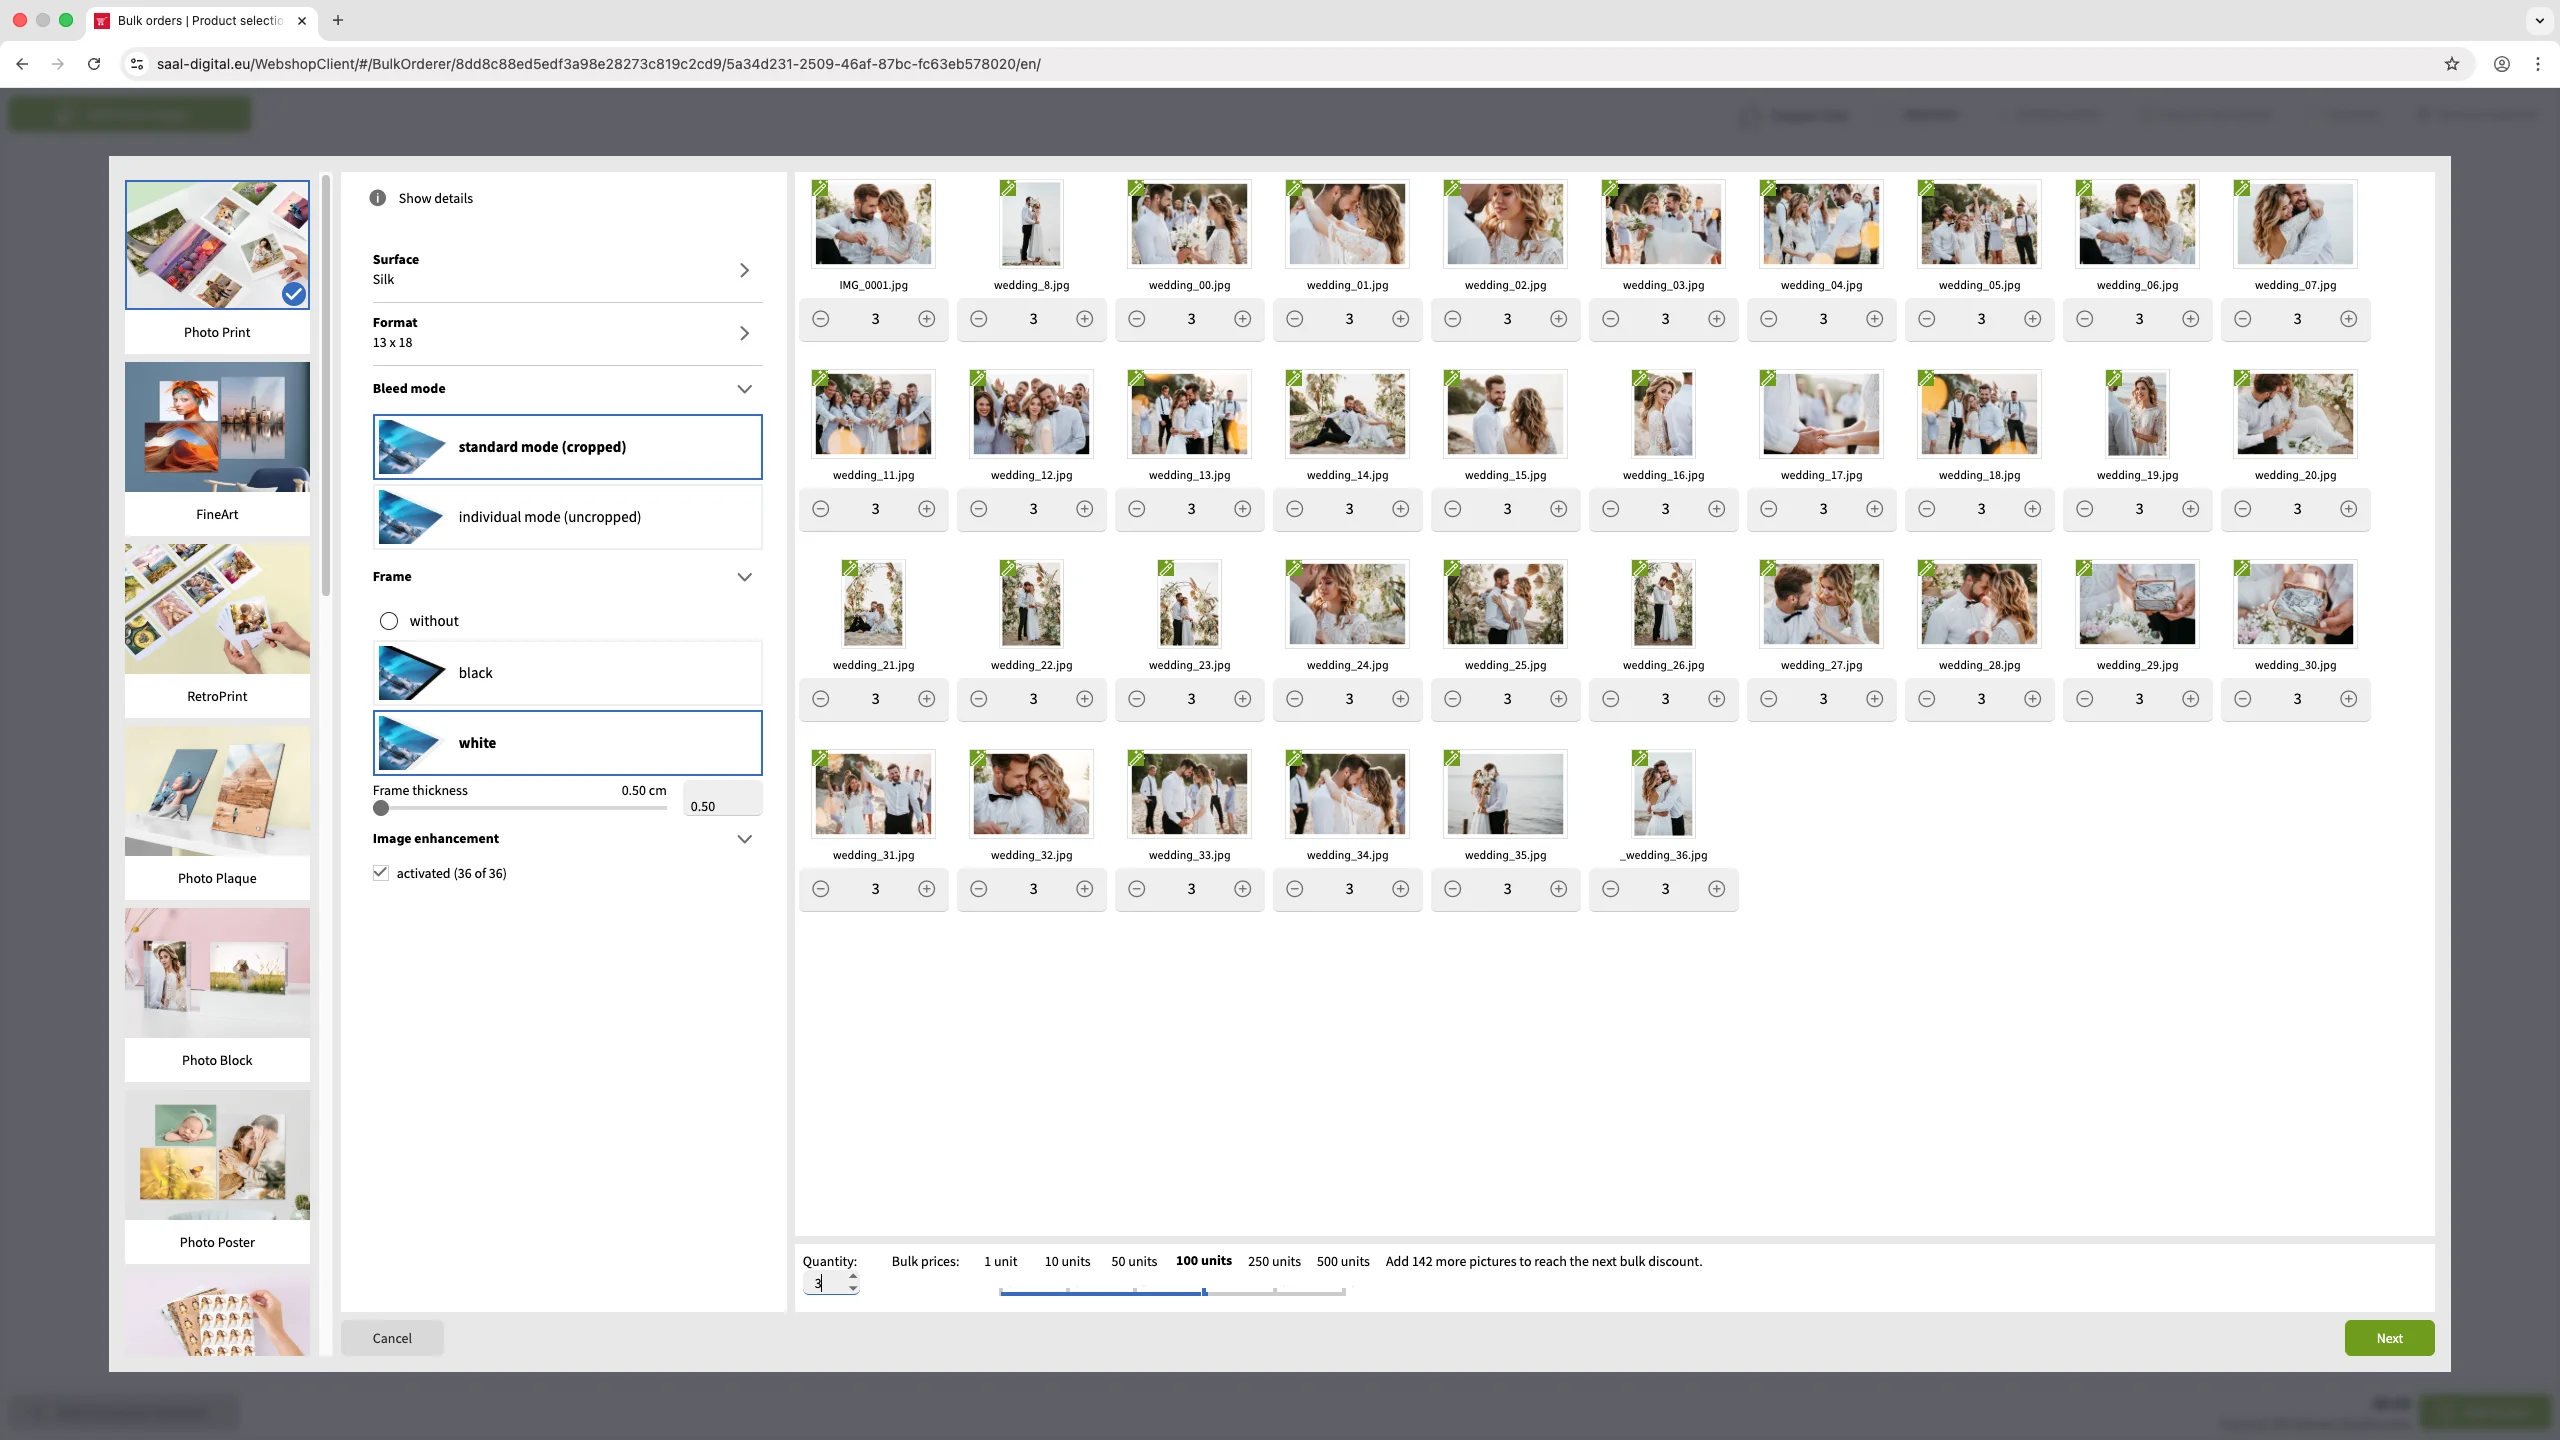
The right column shows all the photos you have selected and added. You can adjust the number of copies for each photo by changing the value below it. You can either click the minus or plus icon or enter the number manually. To delete an image, move the mouse over it. A bin icon will appear in the top right corner of the image. Click on this to remove the image from the selection.
To set the same number of copies for all selected photos, enter the desired amount in the Quantity box at the bottom of the menu. You can also change the number of copies later.
Each photo is accompanied by a coloured box in the top left corner indicating the image quality based on the selected product. If the Image enhancement feature is enabled, a magic wand icon will be visible within this box. You can enable or disable image enhancement by clicking on this square. Hovering over the square will display the image quality and enhancement status.

Clicking on an image opens a window with information and tools for editing the photo. On the left, you’ll find buttons with the relevant tools; on the right, you’ll see a preview of the image with its cropping frame, illustrating the image box. To modify the image box, move the mouse over the small squares in the blue frame until the cursor changes to a double arrow. Hold down the mouse button and drag the cursor sideways to resize the box. To reposition the image box, hover over it until the cursor changes to a cross, then hold down the mouse button and drag the image to the new position.
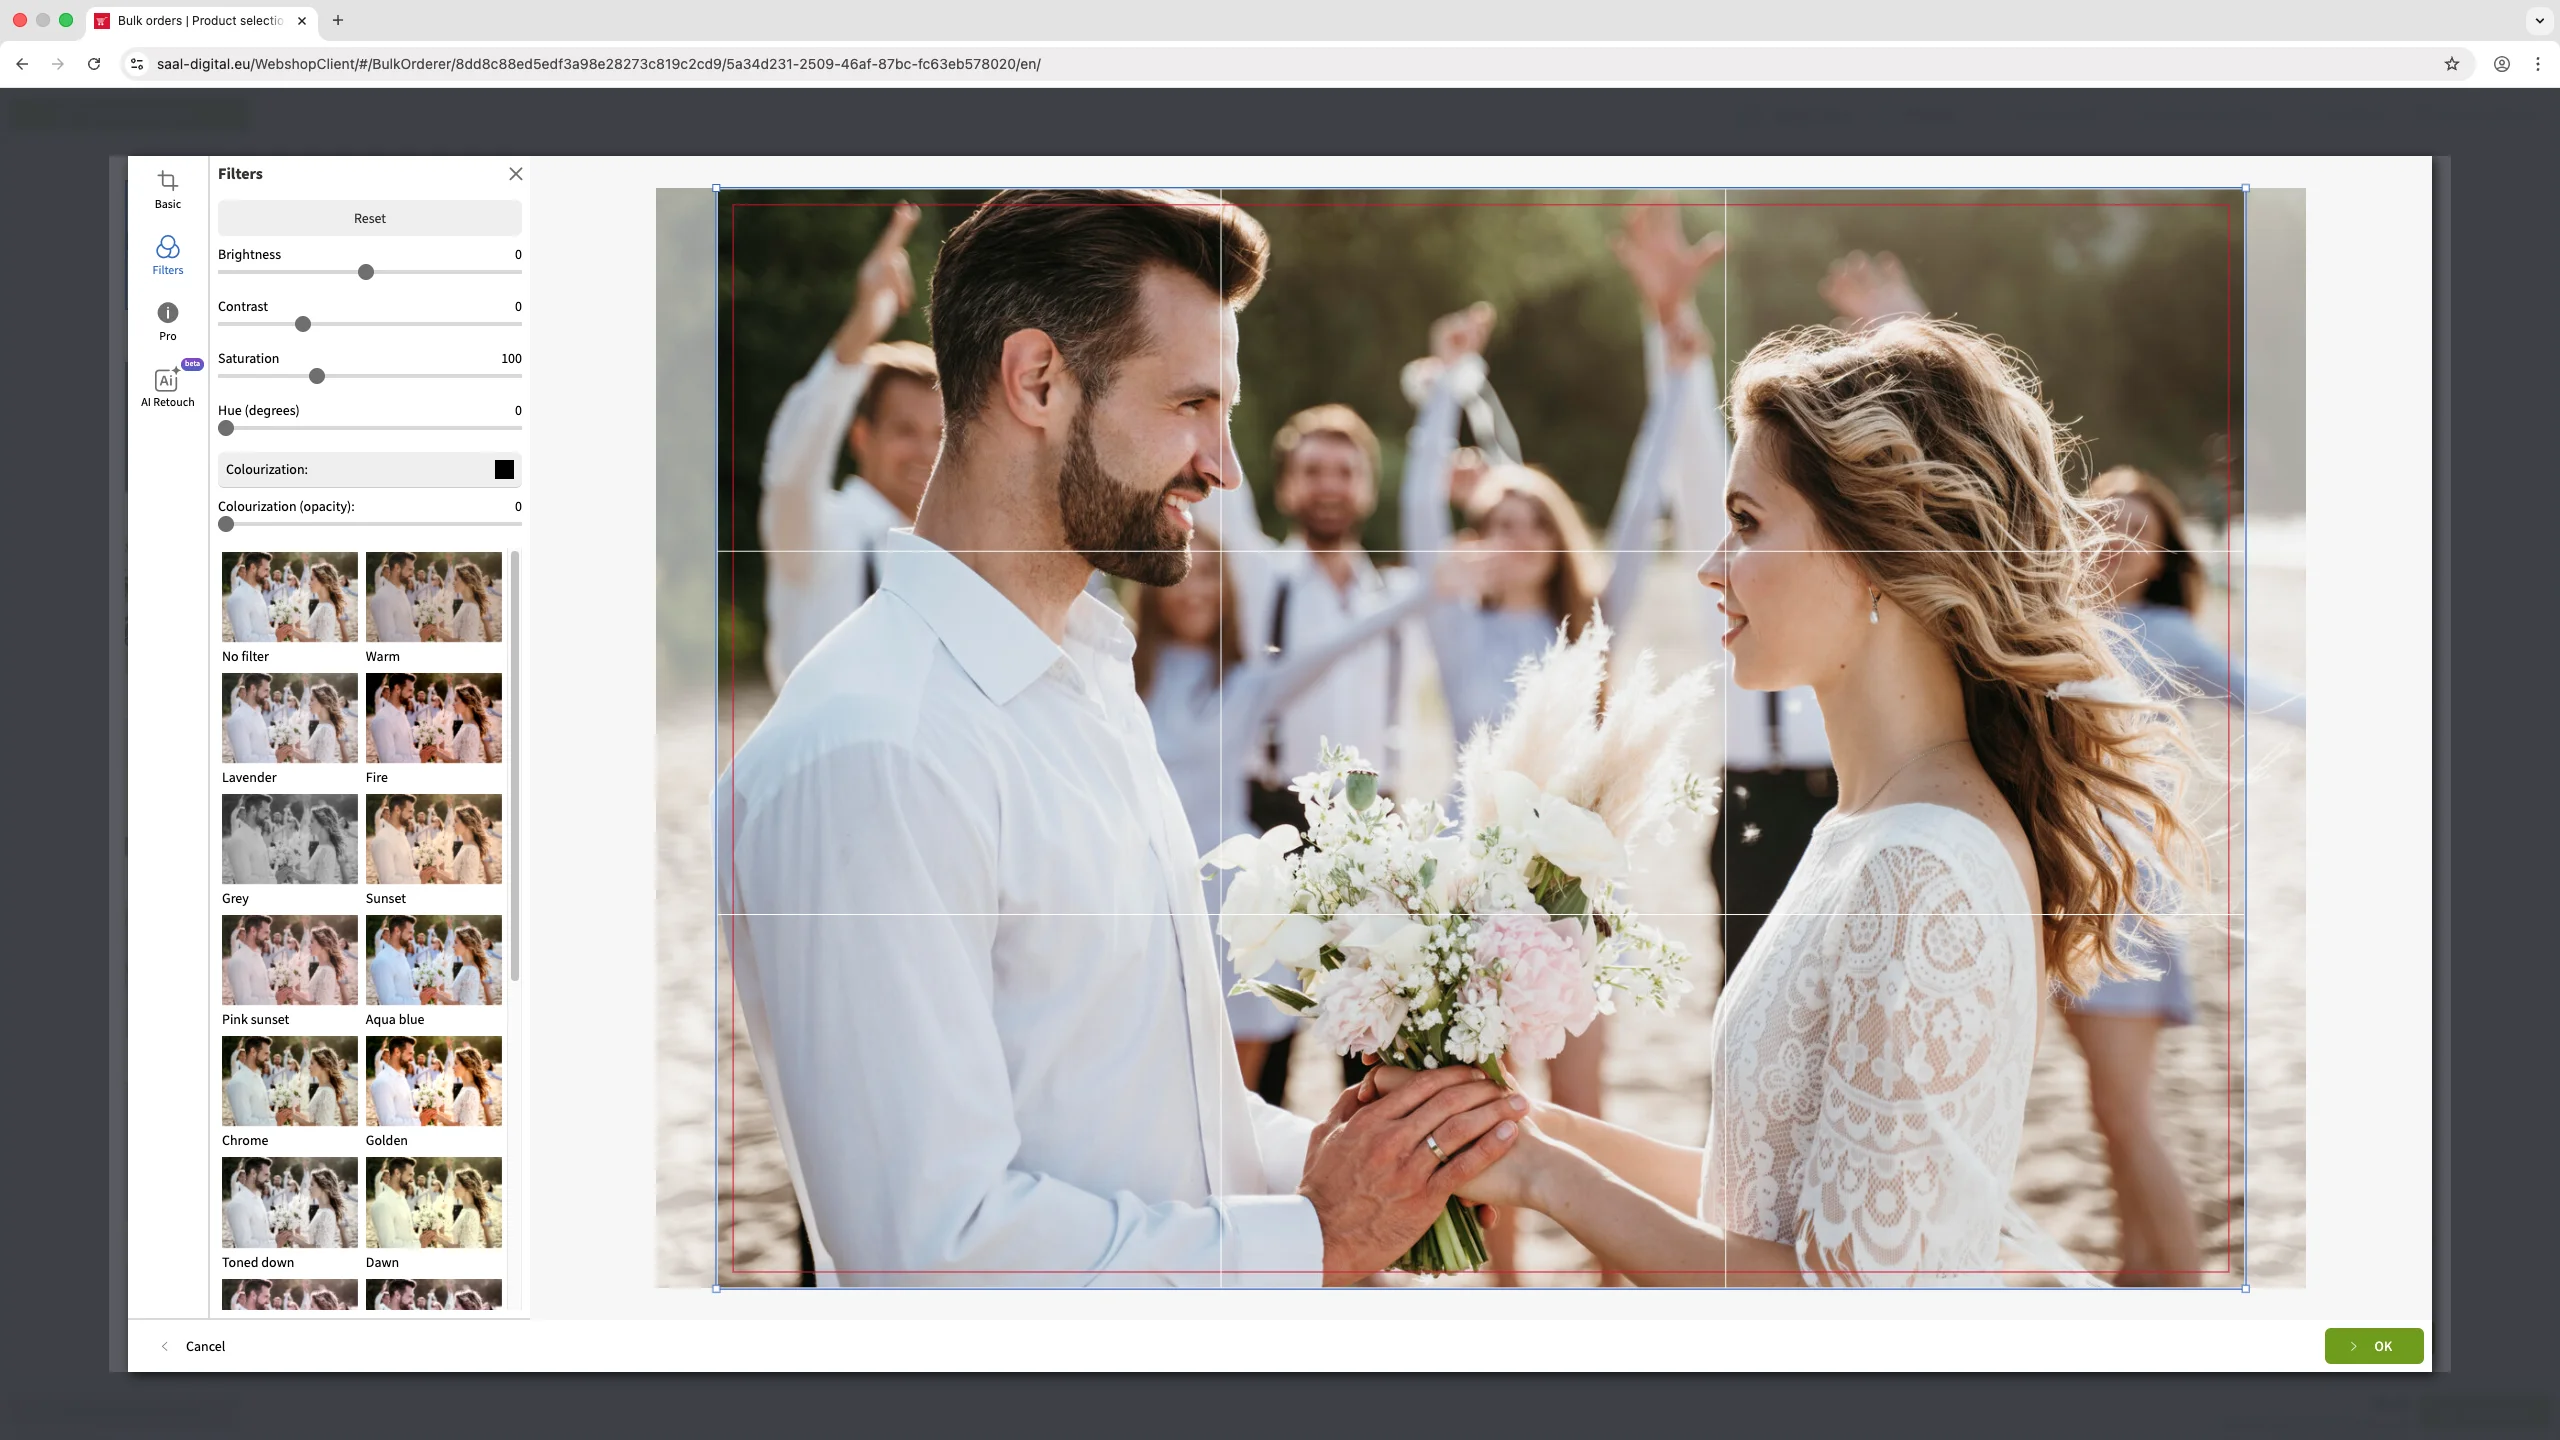
Basic: This section is selected by default. Here you have tools to flip the image either vertically or horizontally, rotate it by 90 degrees and opt for a grid. You can choose from Rule of thirds, Golden ratio or no grid.
Filter: Clicking this option brings up a full set of filter tools. You can adjust brightness, contrast, saturation and hue, or even opt for colourisation.
Pro: Here you will find detailed image details and its histogram. You can also tick or untick the image enhancement function and check the image quality.
AI Retouched: If you want to remove the background, add features to the photo, or make any other modifications using our AI tool, simply type the desired changes into the box. The software will adjust the image as requested. Note: The AI feature may result in a lower resolution.
Click Next to save the changes or Cancel to discard them.
When you have finished configuring the product, click on Next. All selected images will be displayed in a tab with the name of the photo product. You can show or hide the photos by clicking on the arrow to the left of the product name. To add or remove units from an image, click the + or — button at the bottom of the image.
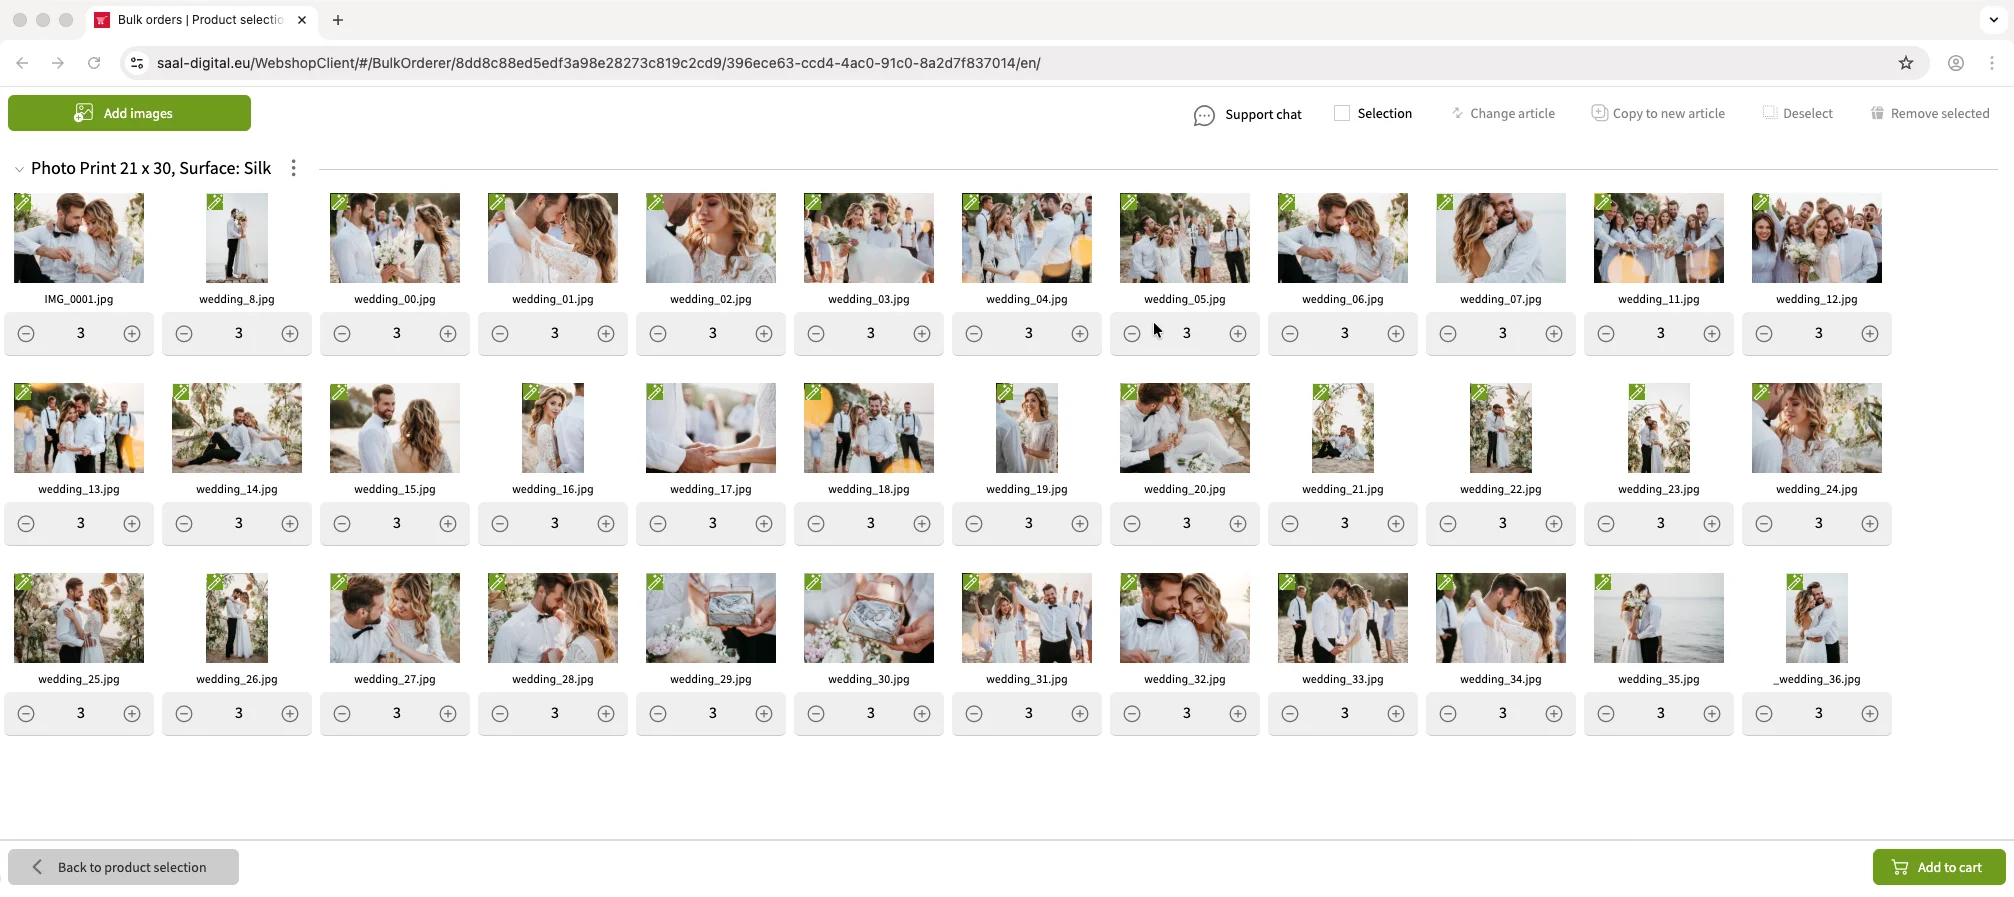
If you want to add more photos to the same product or a new one, click on the Add Images button in the top left corner and follow the same process.
Change Article
You can change the product, size or configuration of the images you have already added. To change all the images within a tab, click on the three dots button next to the product name and select the Change article button. This will bring up a menu where you can select the desired product and configuration for all images.
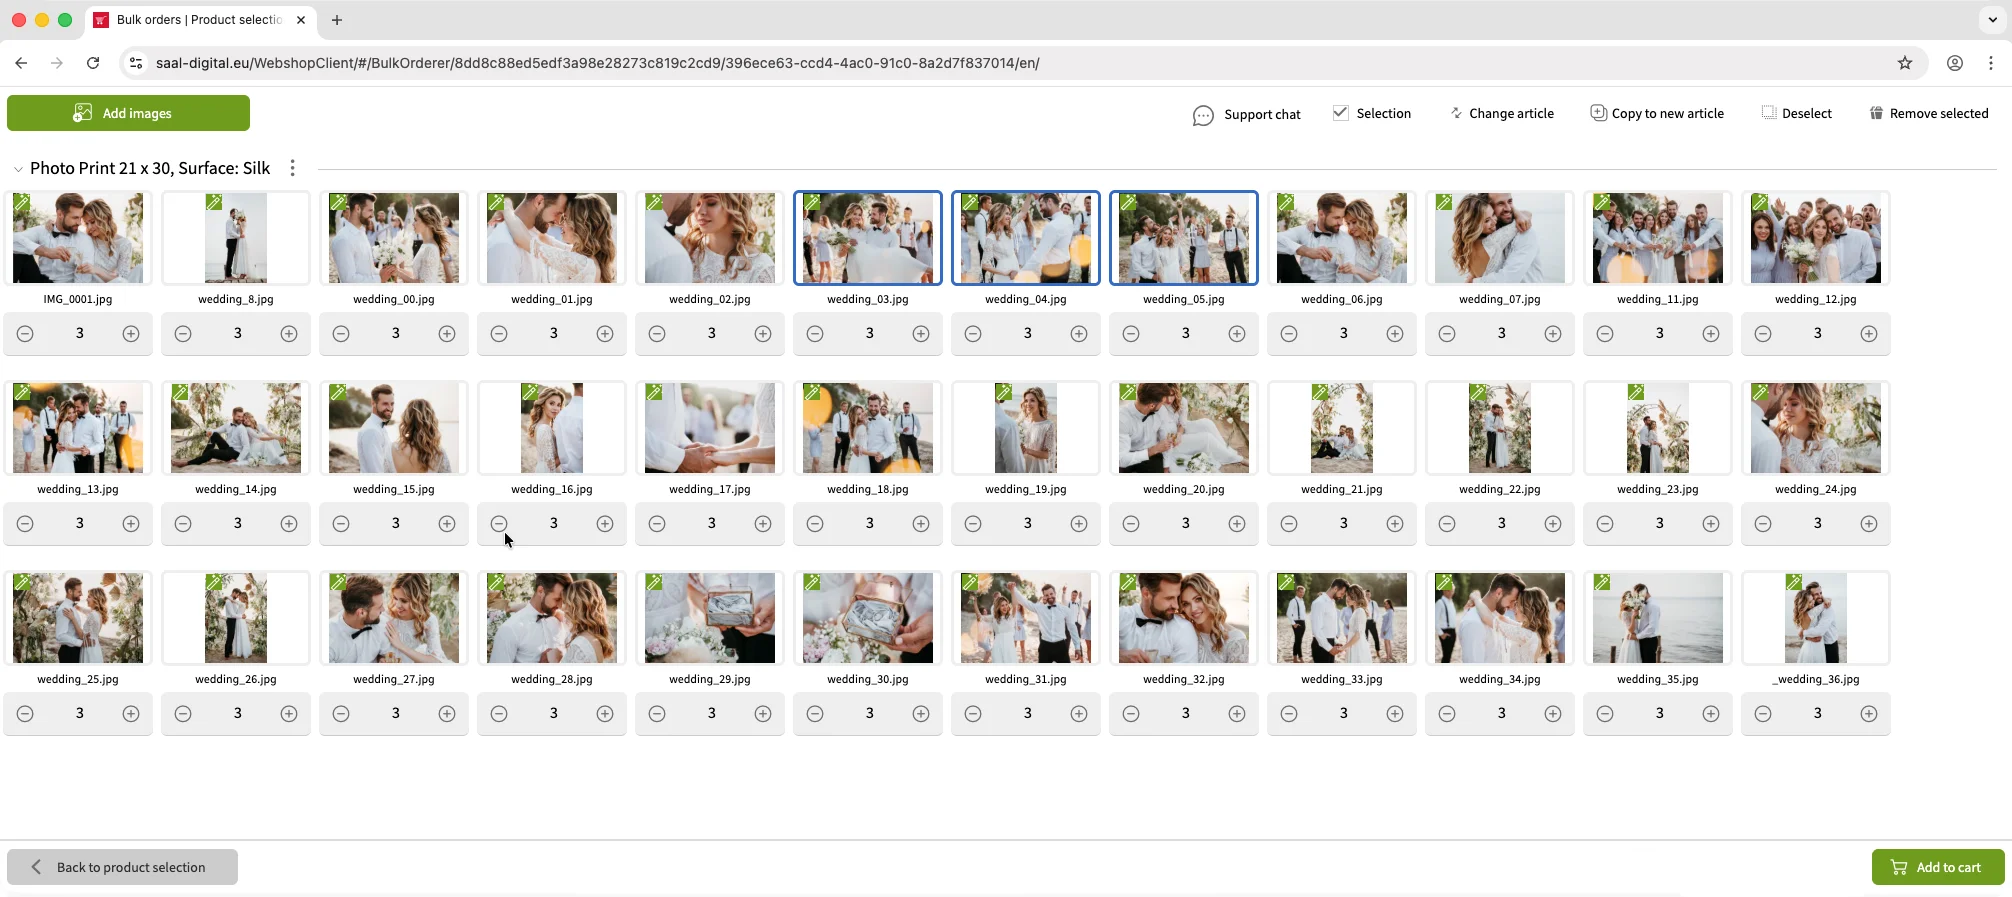
If you only want to change the product or format for some of the photos, first click on the Selection checkbox in the top right-hand corner. This will allow you to select specific photos by clicking on them. The selected photos will be highlighted in blue. Then click the Change article button in the top right-hand corner. This will bring up a menu where you can select the product and configuration for the selected photos. When you’re ready, click Next. The selected photos in the selected category will appear in a new tab and will be removed from the previous selection.
Copy to new article
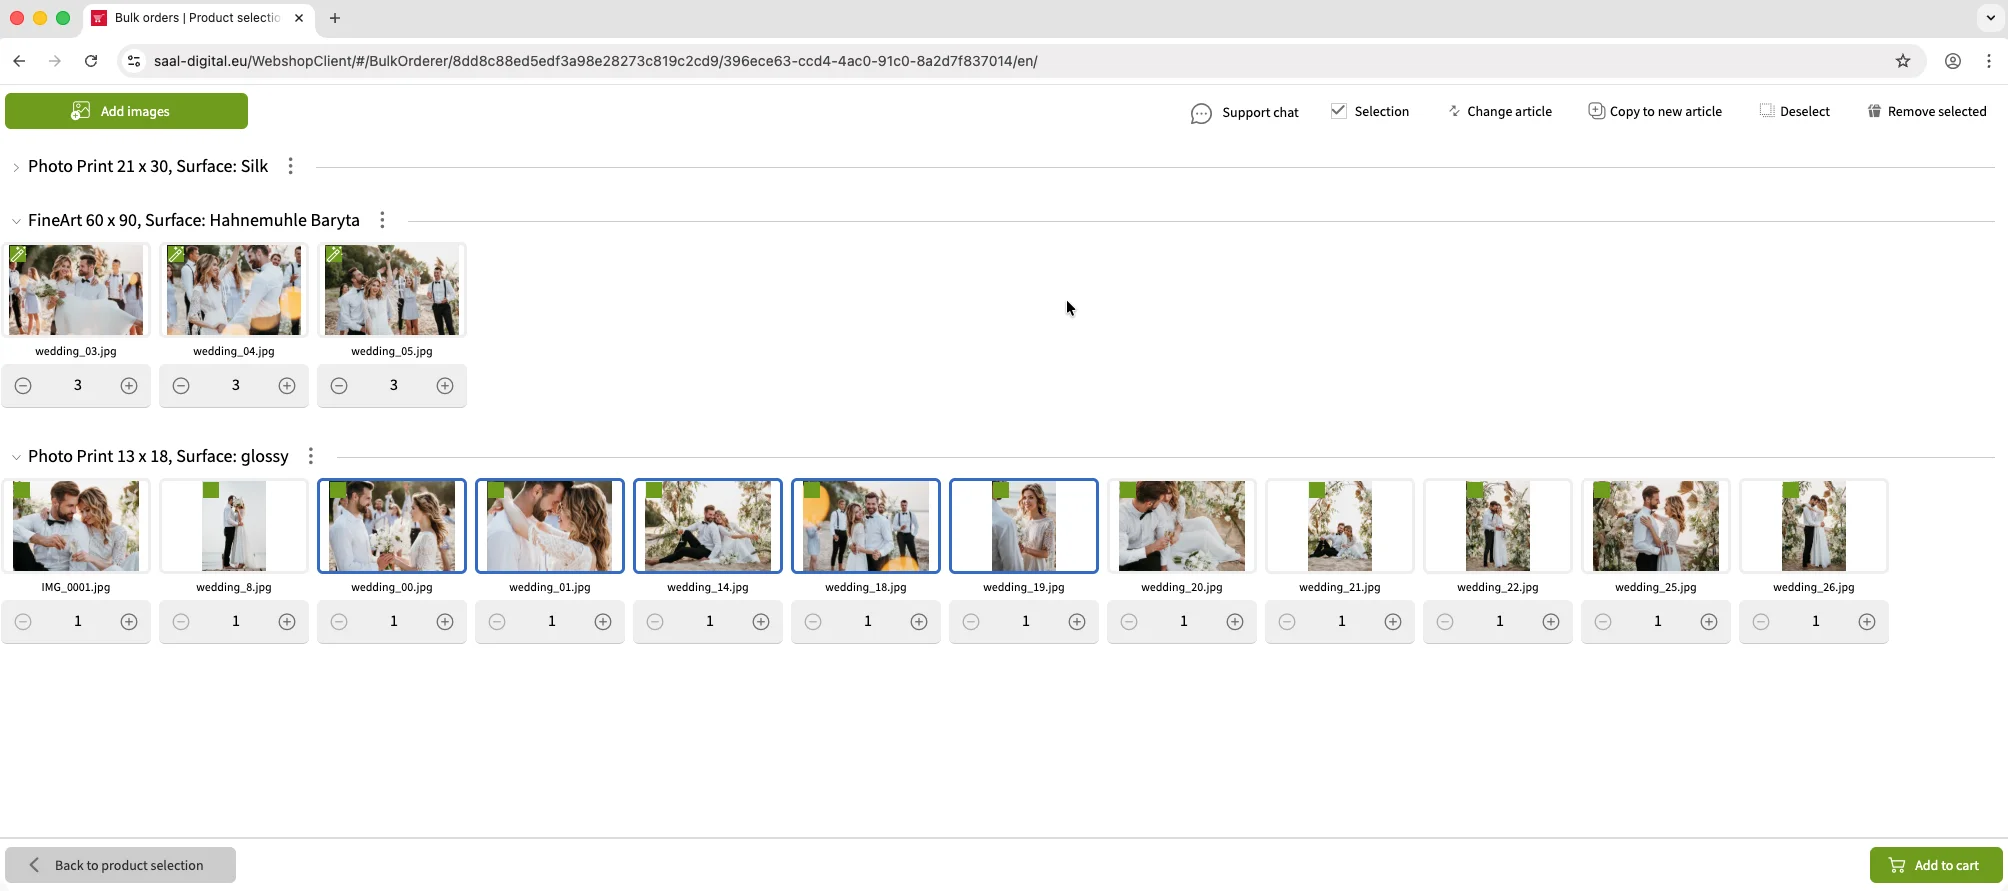
If you want to order the same images as a different article, select the desired images from your current selection and click the Copy to new article button in the top right corner. This will open a menu where you can choose the product and configuration for the selected photos. Once chosen, click Next. The selected photos will be added to a new tab as the configured article, while keeping the original selected images untouched.This feature is especially useful for ordering the same image in different formats.
Delete photos
To remove all photos in a product selection, click the three dots button and select Delete.
To remove specific photos, click the Select checkbox in the top right corner to select the photos you want to delete. Selected photos will be highlighted in blue. Once selected, click the Remove selected button in the top right corner. This will remove only the selected photos from the category.
When you are finished, click on Add to cart.


