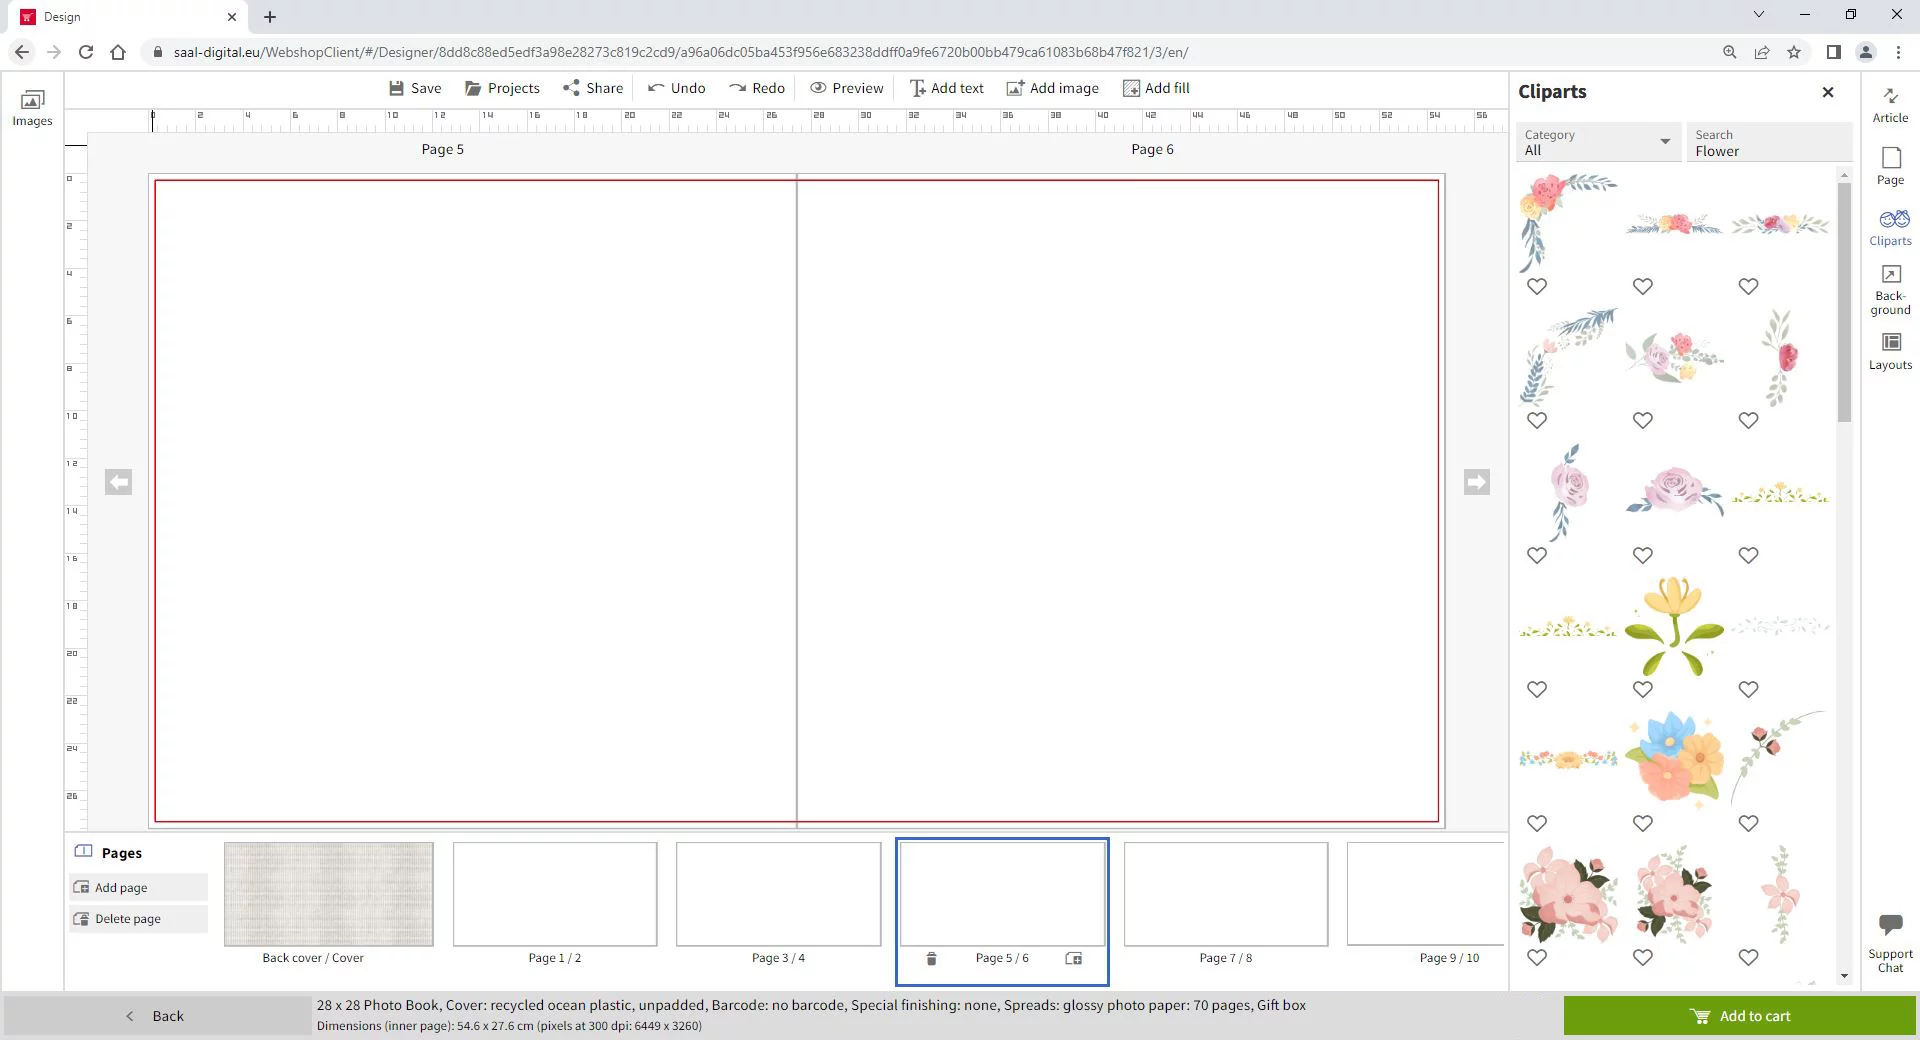
Cliparts
An extensive selection of cliparts is available for use in your designs. These can be viewed by clicking on the Cliparts button in the right-hand menu. You can refine your search by selecting a category from the Category box or by entering a specific keyword in the Search box.

You can mark your favourite clipart by clicking the heart icon at the bottom of each clipart. The heart icon will turn grey, and your favourite clipart will be displayed at the top of the clipart menu for quick and easy access. To remove a clipart from your favourites, click the heart icon again to unmark it.

To add the clipart to the photo product, select the clipart by holding down the mouse button and dragging it onto the photo product. The clipart will be placed on top of the product with the default settings. You may need to adjust its size and position to fit your design. When a clipart is selected, a menu will appear above it with options to flip it horizontally, vertically and delete it.

As with the other objects, when a clipart is selected, buttons with its tool will appear on the right. The colours of the clipart can be modified by applying filters. For more information, see the Apply filters article. Remember that the Position menu contains the alignment, layer and opacity tools.


